

*As an Amazon Associate we may earn from qualifying purchases when you buy through links on our site.
One day you’re getting free, live television from a TV antenna and then the next day you’re not. But everything worked the day before. What happened?
To identify the cause as quickly as possible, it’s necessary to first look at your TV and connected devices. If nothing’s found there, you should then proceed to inspect your TV antenna and, if necessary, consider causes that are external to your home.
In many cases, a “No Signal” message will likely originate from your television and its connections, rather than from your antenna. Nonetheless we’ll cover a step-by-step elimination process for making your channels available again.
What Does “No Signal” Mean?
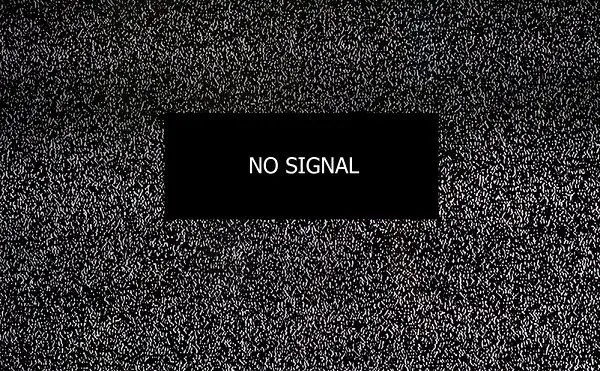
A “No Signal” message on your television (or a blank screen) simply means that your TV is no longer receiving signals from the designated input.
For example, if you wanted to watch TV from a connected media player, and you switch the media player off, then you’ll see this message displayed on your television.
If you’re using a TV antenna and you see this message, it may have something to do with your antenna, but then it may also be caused by something else.
It’s therefore important to do a quick process of elimination (in sequence!) to quickly identify the origin of the problem.
Check the HDMI Connections to Your TV
If your TV antenna is connected to an external media device (e.g., set-top box or media player like a Tablo) rather than directly to your television, then that device is likely connected to your TV via an HDMI cable. Check whether this cable is faulty or incorrectly plugged in.
Verify Your HDMI Cable is Correctly Plugged In
Verify the cable is correctly plugged into both devices using the correct HDMI ports (if there’s more than one) and that the cable itself isn’t worn or damaged.
To ensure the cable’s not a fault, try using it on a different device.
You might also use the input or source button on the TV’s remote control to cycle through the different input sources (such as HDMI 1, HDMI 2, AV, etc.) to confirm your TV’s getting the right source. Even if this doesn’t fix the problem, it’s worth trying this as a first step.
Use Different HDMI Ports
If your TV or external device has more than one HDMI port, try plugging the cable into a different port to see if this brings back your channels. This eliminates the possibility of a faulty HDMI port as the culprit.
Restart Your TV and Other Devices
These days many TVs have an operating system or internal software that requires an occasional reboot to function properly. The same goes for set-top boxes, media players, and similar devices.
Often we turn these devices off when not in use, but this doesn’t mean they’re completely shut down.
1. Turn off your television or connected device.
2. Unplug the power cable.
3. Plug the power cable back in.
4. Turn the television or device back on.
These steps effectively reset the software of the device.
If you follow these steps and find that TV channels are missing, you should re-scan channels on your TV to re-tune your antenna.
Check For Firmware Updates of Your TV and Other Devices
Firmware is a type of software that controls the hardware of a device. Manufacturers occasionally update the firmware of their products to provide new features or security updates.
It’s worth checking whether updates are available for your TV or connected device such as set-top box, as old firmware may be hindering the functioning of the device.
For smart TVs and devices that are connected to the internet, updating the firmware is straightforward since the device will download and update it when prompted. For a “dumb” TV that’s not connected to the internet, you may need to contact your dealer or look in the manual for options.
In any case, an internet-connected device will usually have a “Check for Updates” option in its support menu.
Check the Antenna Coaxial Cable and Connections
If your TV continues to display “No Signal” and you’ve verified your television and its connected devices are working properly, then it’s time to consider your over-the-air (OTA) antenna and its connection to your TV.
Depending on the amount of time since the antenna was installed, it may be that the fault lies somewhere with the antenna or with some other part downline to your TV. You should check the main components sequentially to identify the cause.
Verify the Condition of the Antenna Coaxial Cable
Start first by checking whether the coaxial cable is properly plugged into your TV, set-top box, or whichever device is receiving OTA signals.
If you see indeed that the coax is tightly connected to the device’s port, inspect the cable itself (all the way to the antenna) to ensure the cable’s outer sheath isn’t frayed or worn. Modern RG6 cable that’s tri- or quad-shielded ensures better insulation than older RG59 cable, which features thinner sheathing that’s more vulnerable to electromagnetic interference.
As well, check that the cable isn’t bent in places (e.g., at a 90-degree angle) on its way to the antenna. Also, look at the condition of the coax cable that’s found outdoors, as it’s most exposed to the elements.
Check the Coaxial Cable’s Connections
Even more critical are the places where the cable attaches or terminates with other devices.
Moisture can eventually seep into corroded coax F-connectors and interfere with electrical signals, and so it’s vital to ensure there’s no corrosion or leakage in places like where the cable’s attached to a splitter, an amplifier, or the antenna itself.
If you need to, unplug the cable and dry it, and consider wrapping moisture-proof tape such as Parts Express Coax Seal Moisture Proof Sealing Tape around the connection.
Or you can apply waterproof grease such as STUF Dielectric Waterproofing Grease to both the cable’s core and its connector, before plugging it back in. Keep in mind that although it’s a kind of grease, it won’t interfere with your TV signals.
Verify Any Devices Along the Coaxial Line to Your TV Antenna
Make sure to also check the working condition of any amplifiers, splitters, and other devices to which the coax is connected. These tend to be relatively robust and simple devices, but may malfunction or become worn out nonetheless if they’re of low quality or relatively aged.
Replace any devices you suspect of being damaged or excessively aged.
Check Your TV Antenna
OTA antennas are typically manufactured from aluminum, plastic, and other metals, and so tend to be durable and not damage easily. On the other hand, a free-standing antenna may have its orientation changed to point away from broadcasting towers under extreme weather conditions.
You should have a quick look at your antenna to make sure it’s not damaged by rust or corrosion. If it is, consider replacing it with a new unit.
If you’re still getting a “No Signal” message on your TV, you may want to verify your OTA antenna and its connection as a last step.
Fasten the Antenna and Secure It If Necessary
Ensure that your antenna is still properly oriented towards transmission towers and well secured so that it doesn’t sway, as swaying can cause poor reception and signal dropouts. If necessary, tighten any fastenings and secure it with guy wires.
Verify That the Antenna’s Connection Is Weatherproof
Antennas typically use a balun or weather boot to protect connections with the coaxial cable or transformer. If your antenna has one, verify that it isn’t cracked or broken to ensure that it’s still waterproof and protects the connection from the elements.
Final Thoughts
Hopefully you’ve gone through all of the steps and have found the cause of the “No Signal” message on your television.
Normally with an OTA antenna, poor reception means one or more channels have dropped out, and not that the entire picture is blank. For improving your OTA reception and getting more channels, have a look at our guide.
Remember to have a look at your TV and other devices first before moving on to your TV antenna and its connections.